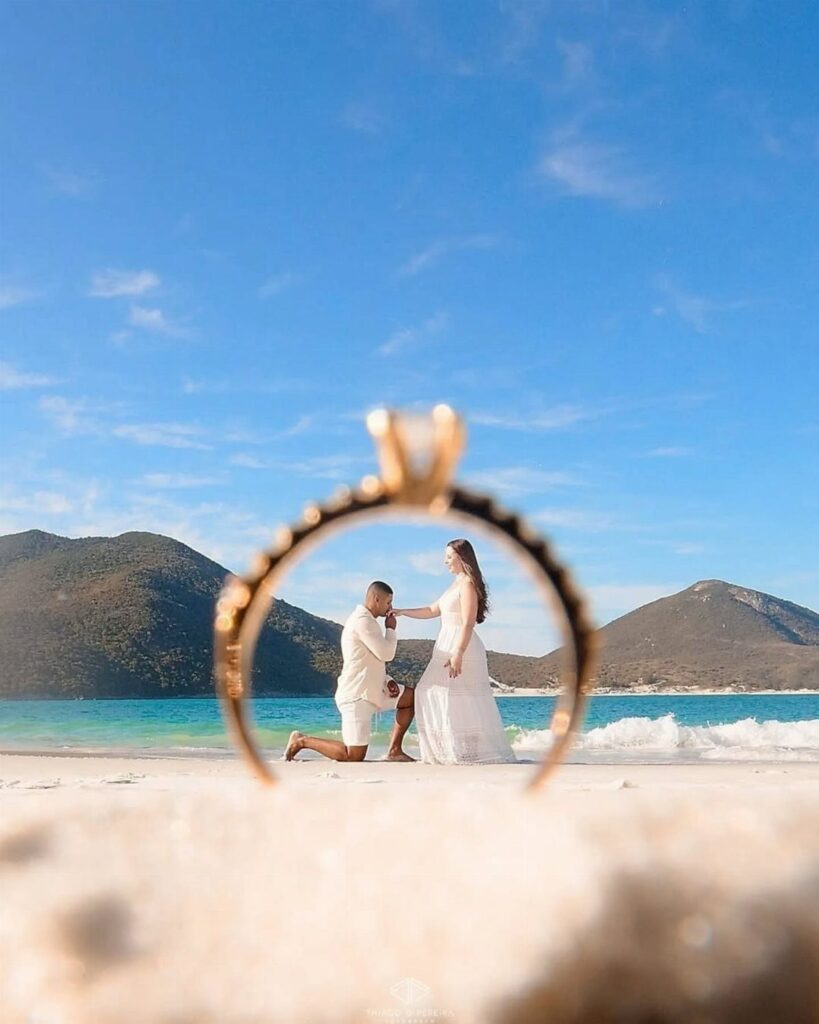
The ideas run from a bare Classic Close-Up with no props to staged setups like a pet’s paw, a seashell or an ornate mini frame, and most cost nothing beyond a clean hand and decent light.
A few f-stop settings, f/8 or f/11, keep the whole ring sharp whichever idea you choose.
1. Classic Close-Up
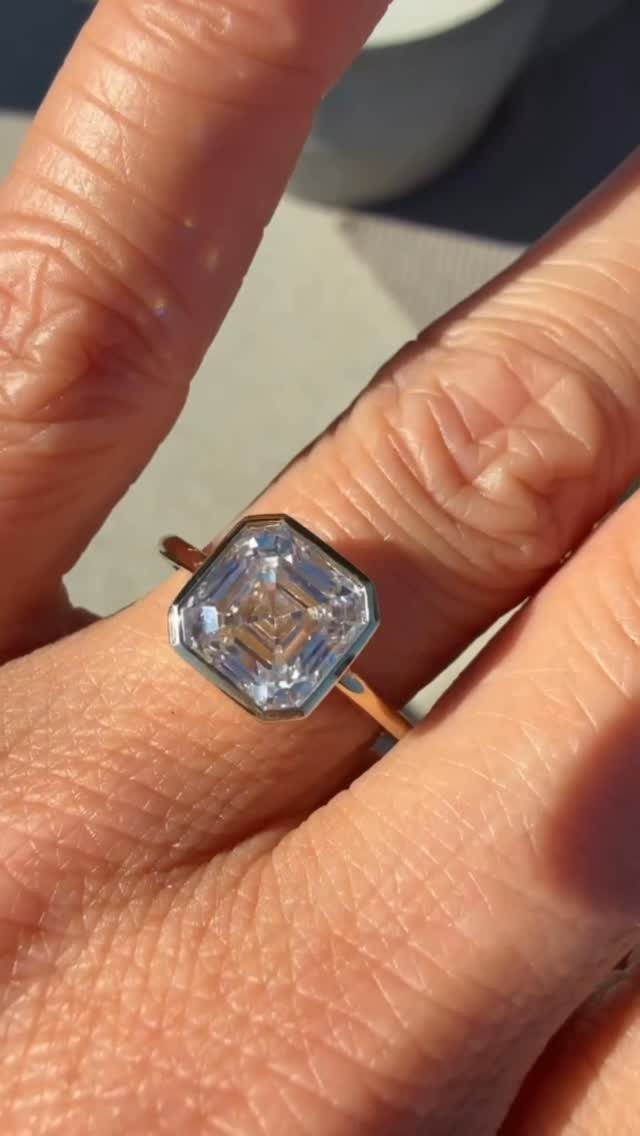
Fill the frame with the ring and little else. An emerald cut reads best in close-up because its long, stepped facets photograph as clean lines instead of scattered sparkle.
Direct sun washes out facets, so shoot in open shade or position the hand so light hits the stone at an angle.
Keep your nails clean and your hand relaxed, fingers slightly apart. This is the one frame I would make sure of before anything more creative.
2. Hand-in-Hand
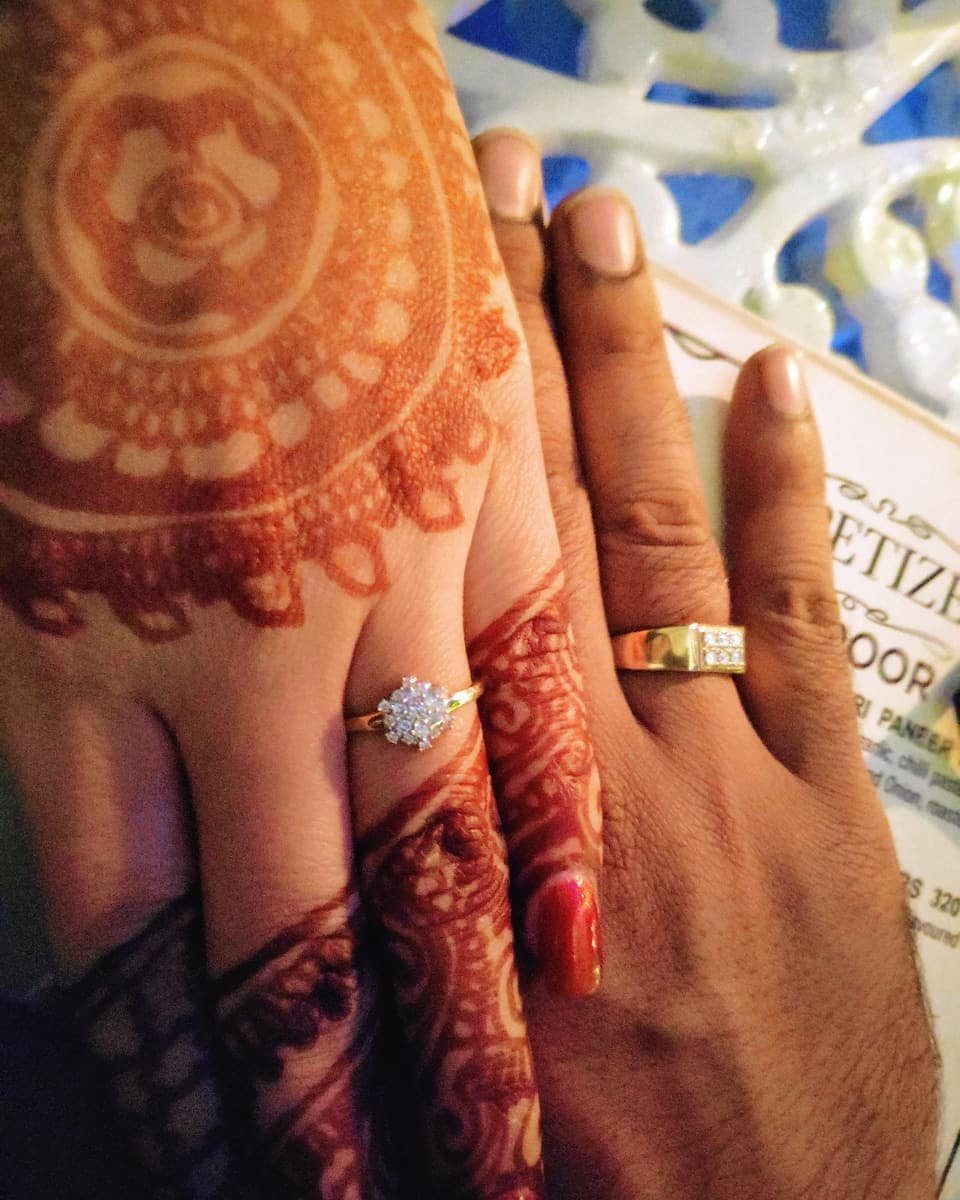
Hold your partner’s hand and let the ring sit in front, with their fingers wrapped around yours. A second ring on the other hand gives the shot a fuller story without bringing in props.
Ask your photographer to focus on the ring finger and let the rest soften.
Watch the background, too: a menu or sign behind your hands pulls the eye away. Keep the backdrop plain and the hands do the talking.
3. Ring in Candid Moments
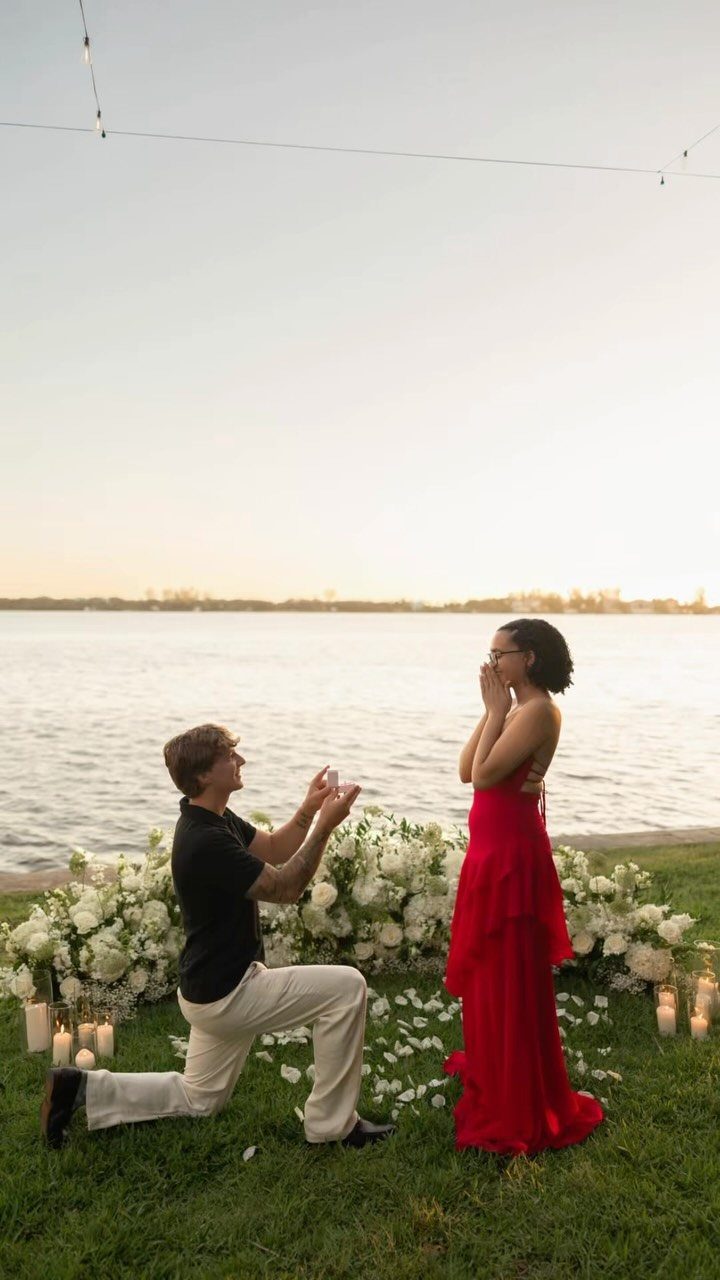
Plan the proposal setting, then let the ring appear on its own. A lake, white flowers and candles give the photographer plenty to work with, and the ring catches light in the middle of a real reaction.
For an engagement shoot, you can stage a re-creation of the moment.
Shoot continuously from the kneel through the reaction, since the frame you want usually lands between the moments you planned. Candles also look better as the light fades.
And, let’s be honest—it’s also a shameless opportunity to showcase your beautiful engagement ring!
4. Silhouette
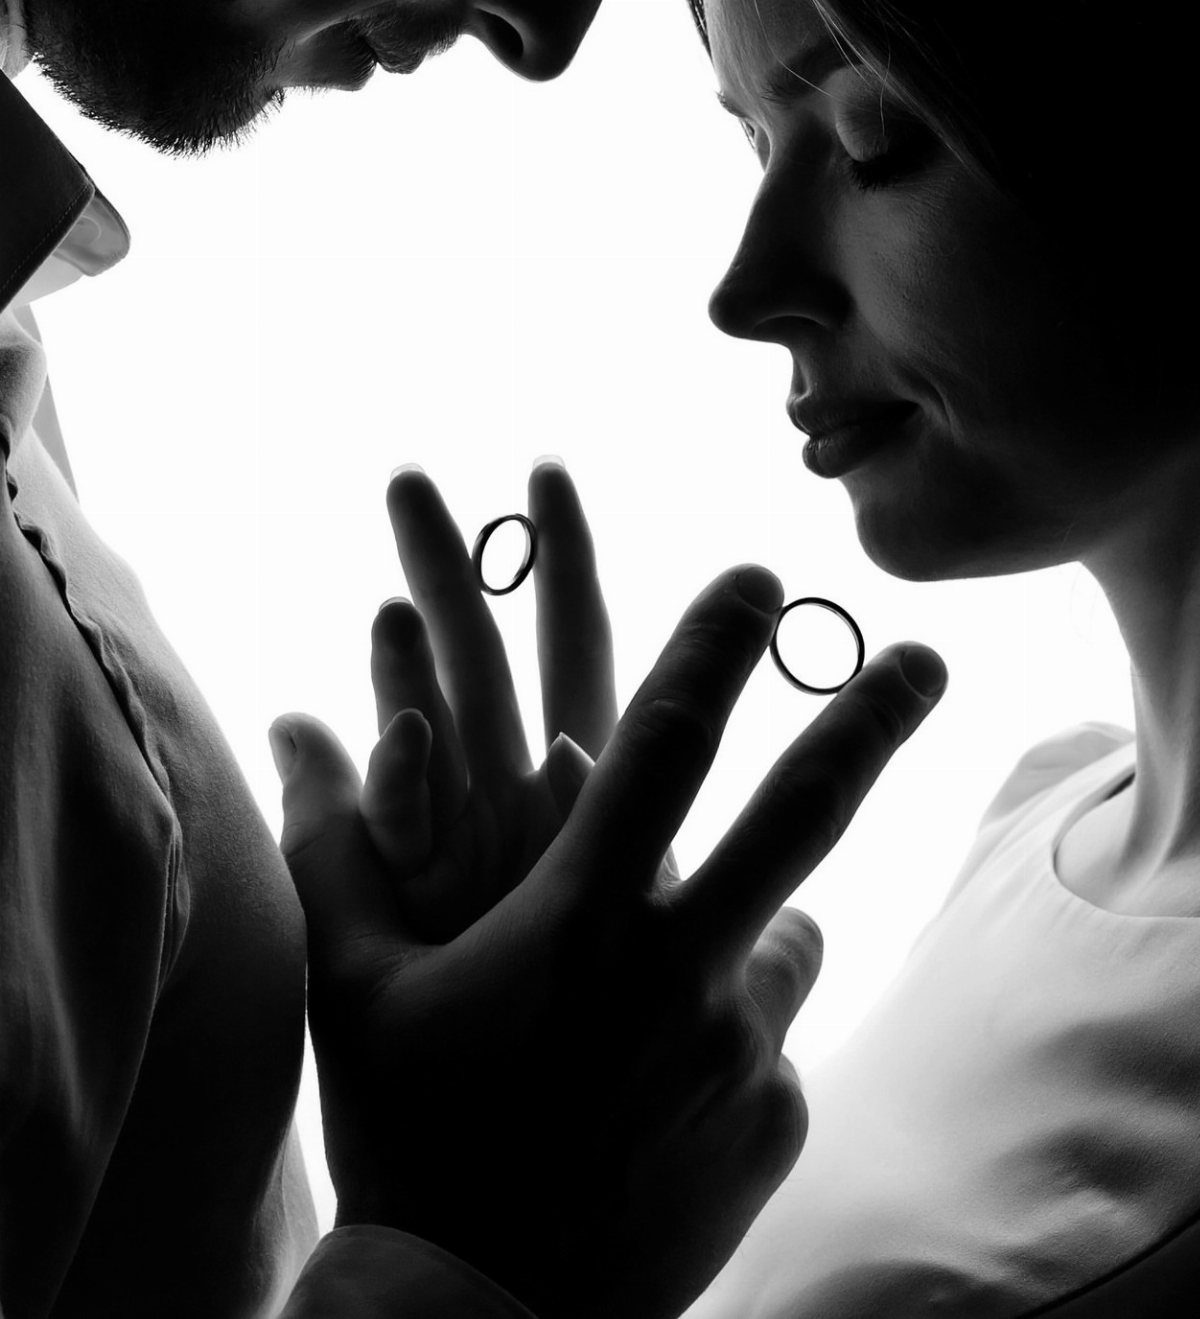
Stand facing each other, raise your hands and hold the rings up against a bright sky or window. A silhouette strips away faces and clothes, so the ring has to read through outline alone.
Keep your hands separate from your bodies, with clear space around each ring, or the shapes merge into one dark blob.
Black and white suits this well. Ask your photographer to expose for the bright background, which turns you both into clean, dark shapes.
5. Floral Backdrop
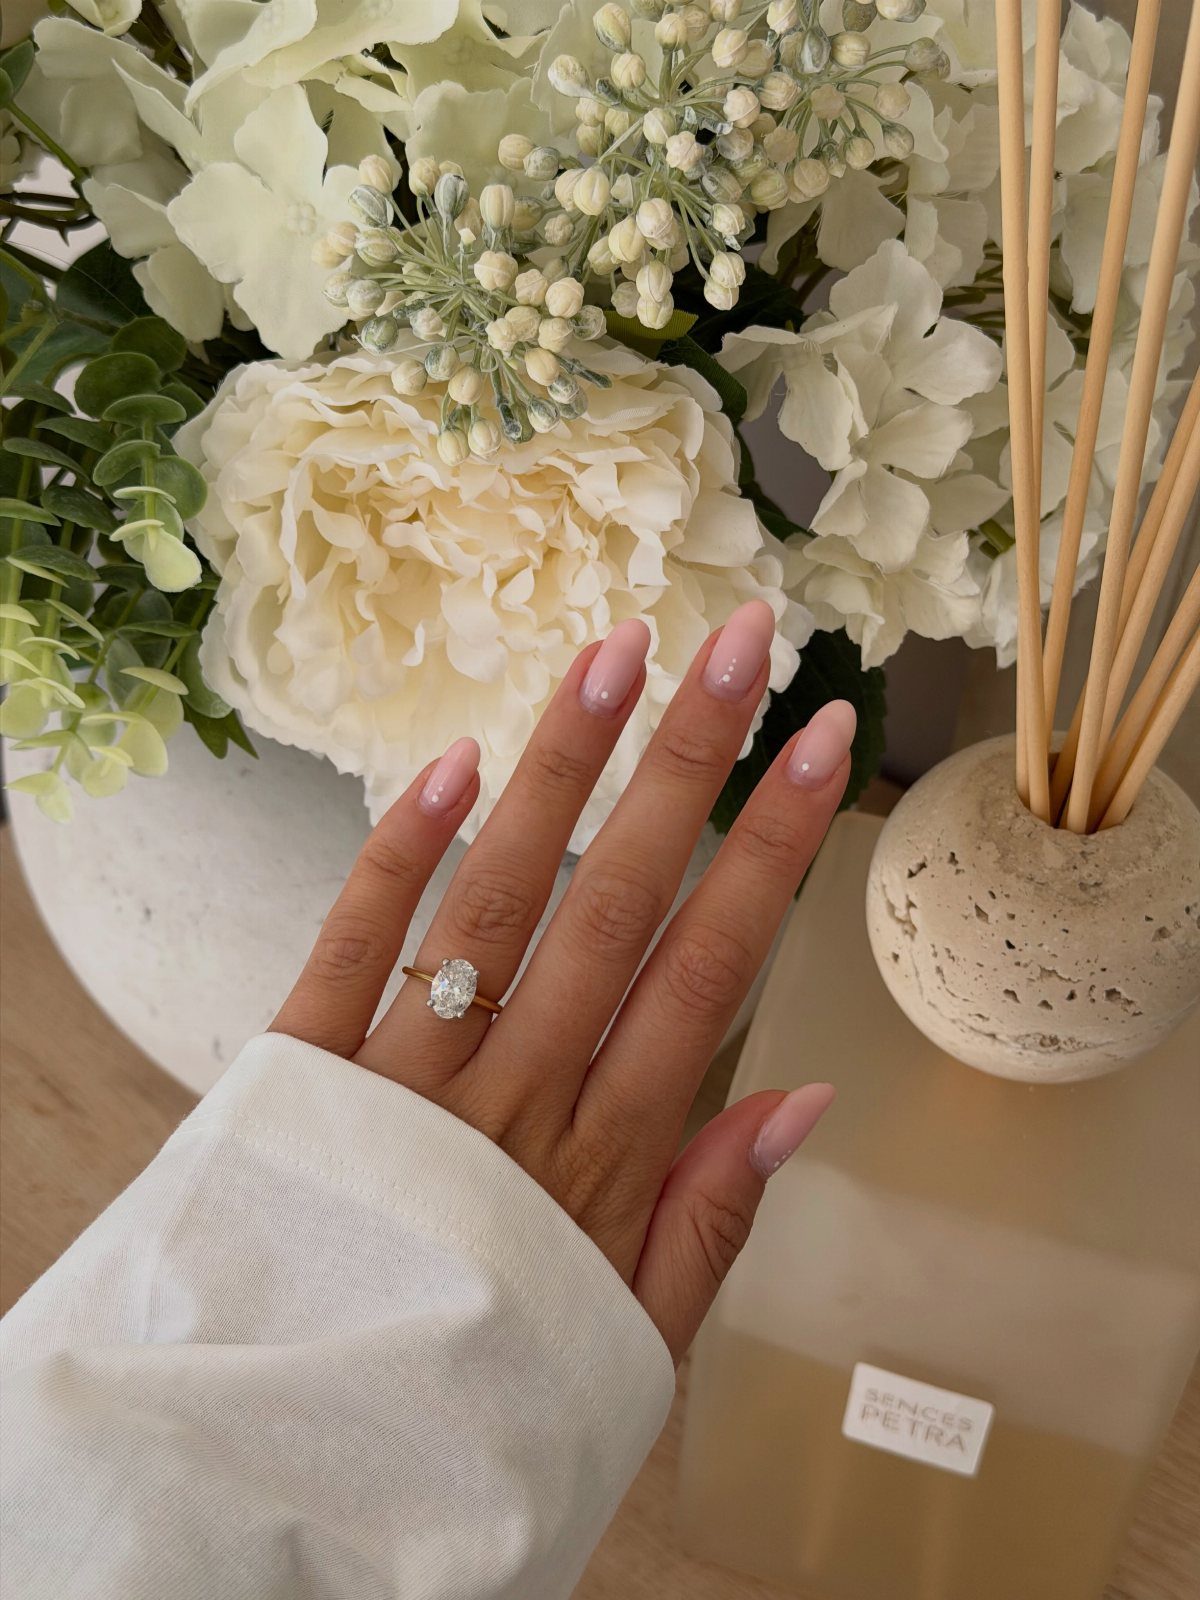
Hold your hand in front of fresh white flowers and the ring gets a soft, pale backdrop that makes an oval diamond glow.
Keep the flowers a little out of focus by placing them a few inches behind your hand. Clear away anything with text or a logo; a stray bottle in the background will draw the eye faster than the ring does.
6. In the Jewelry Box
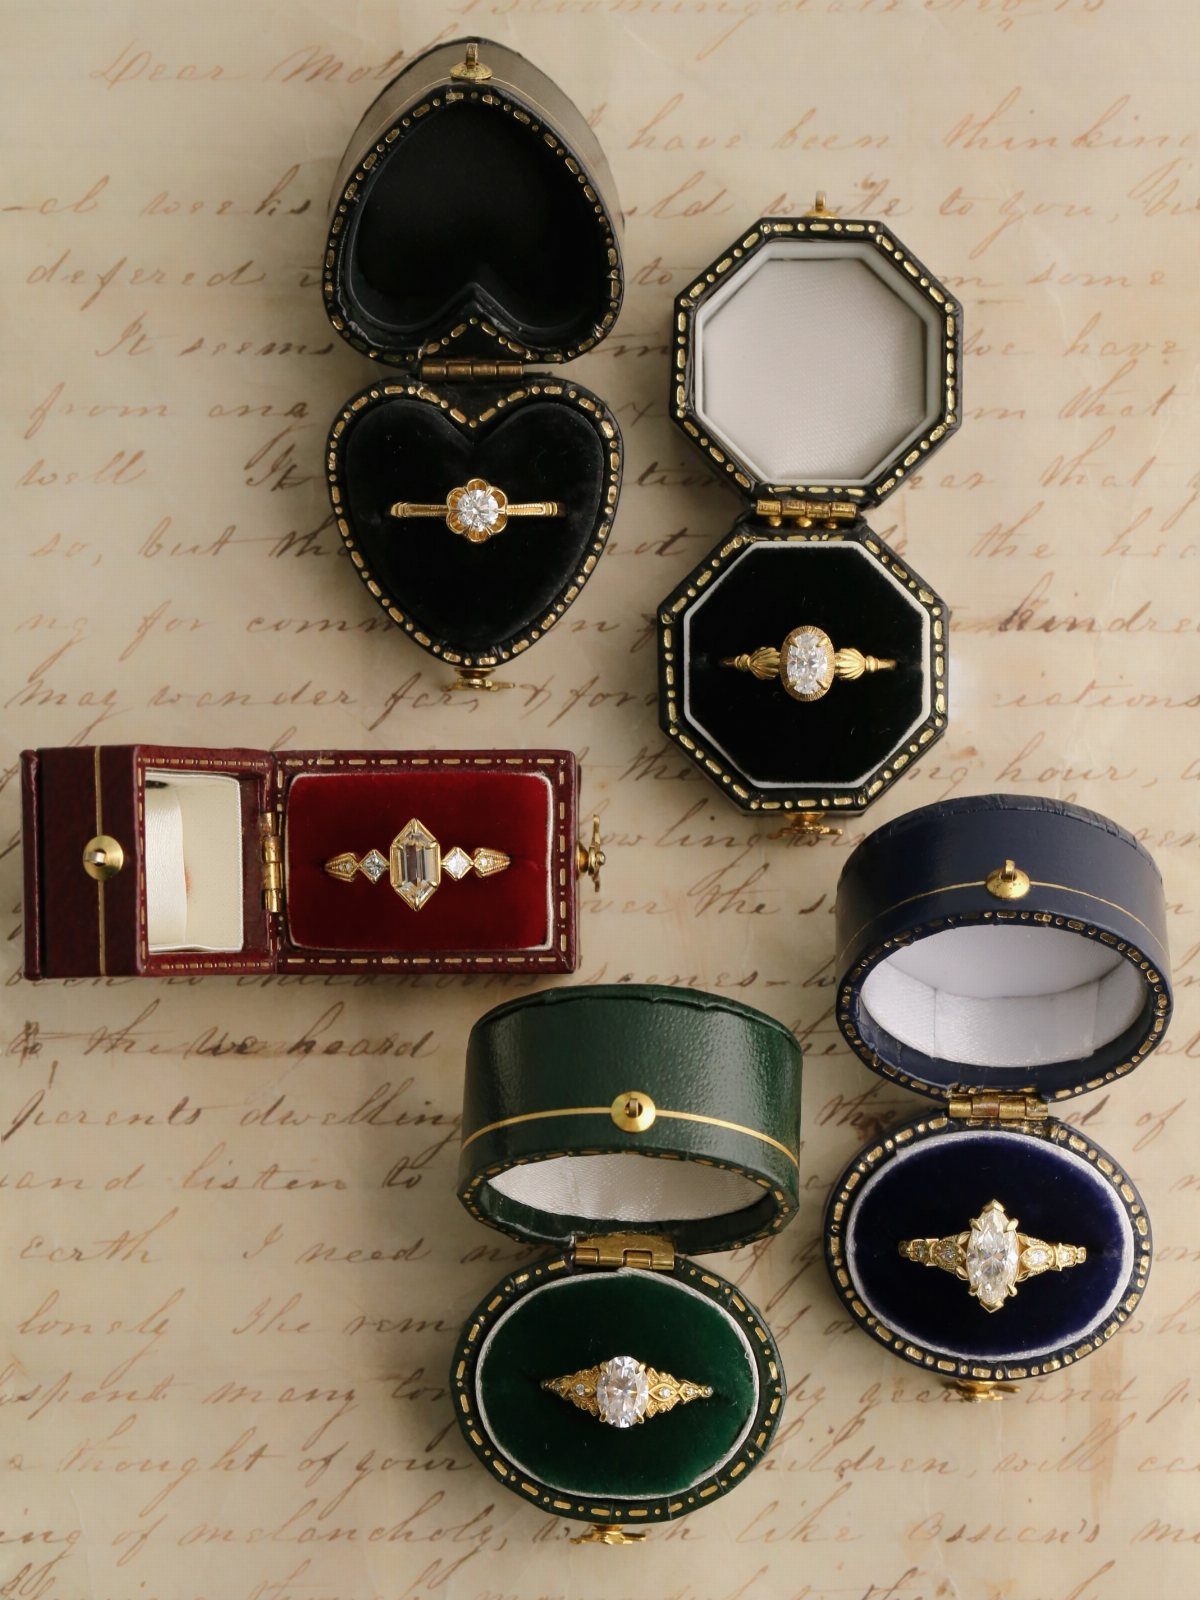
Open the box and let the ring sit in its velvet slot. A vintage box in an unusual shape makes the ring look like something passed down instead of something just bought.
If you have more than one ring, such as a family heirloom, line them up together.
Handwritten letters or aged paper beneath make a lovely surface. I prefer a single, tidy composition, so keep the props few and let the boxes carry the look.
7. Forehead-To-Forehead
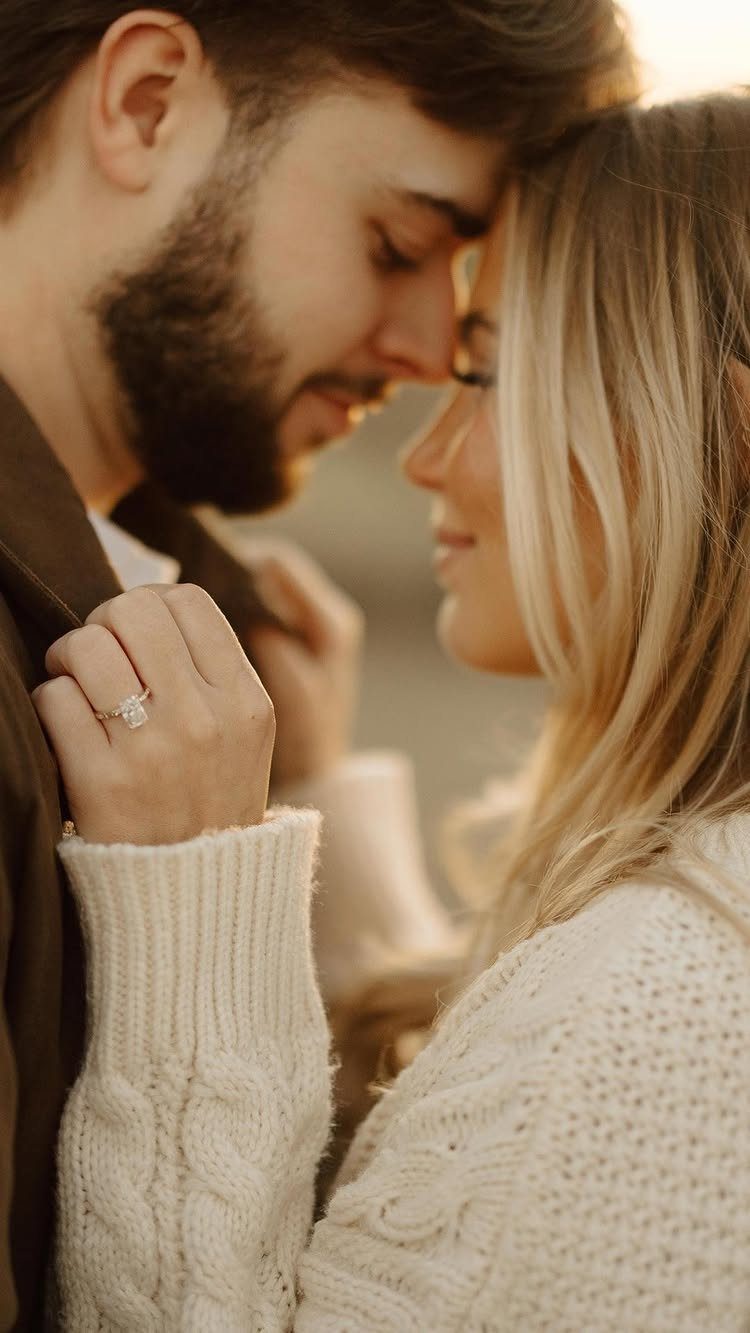
Tilt your heads until your foreheads meet, then close your eyes or look at each other.
With faces this close, the ring needs another route into frame: one hand on your partner’s chest, low enough to land in the bottom corner, does it.
Soft, even light flatters a pose this close.
Ask your photographer to focus on the ring hand and let the faces blur slightly. Hold still for a few breaths; the pose looks calmest when no one is fidgeting.
8. Couple Selfies
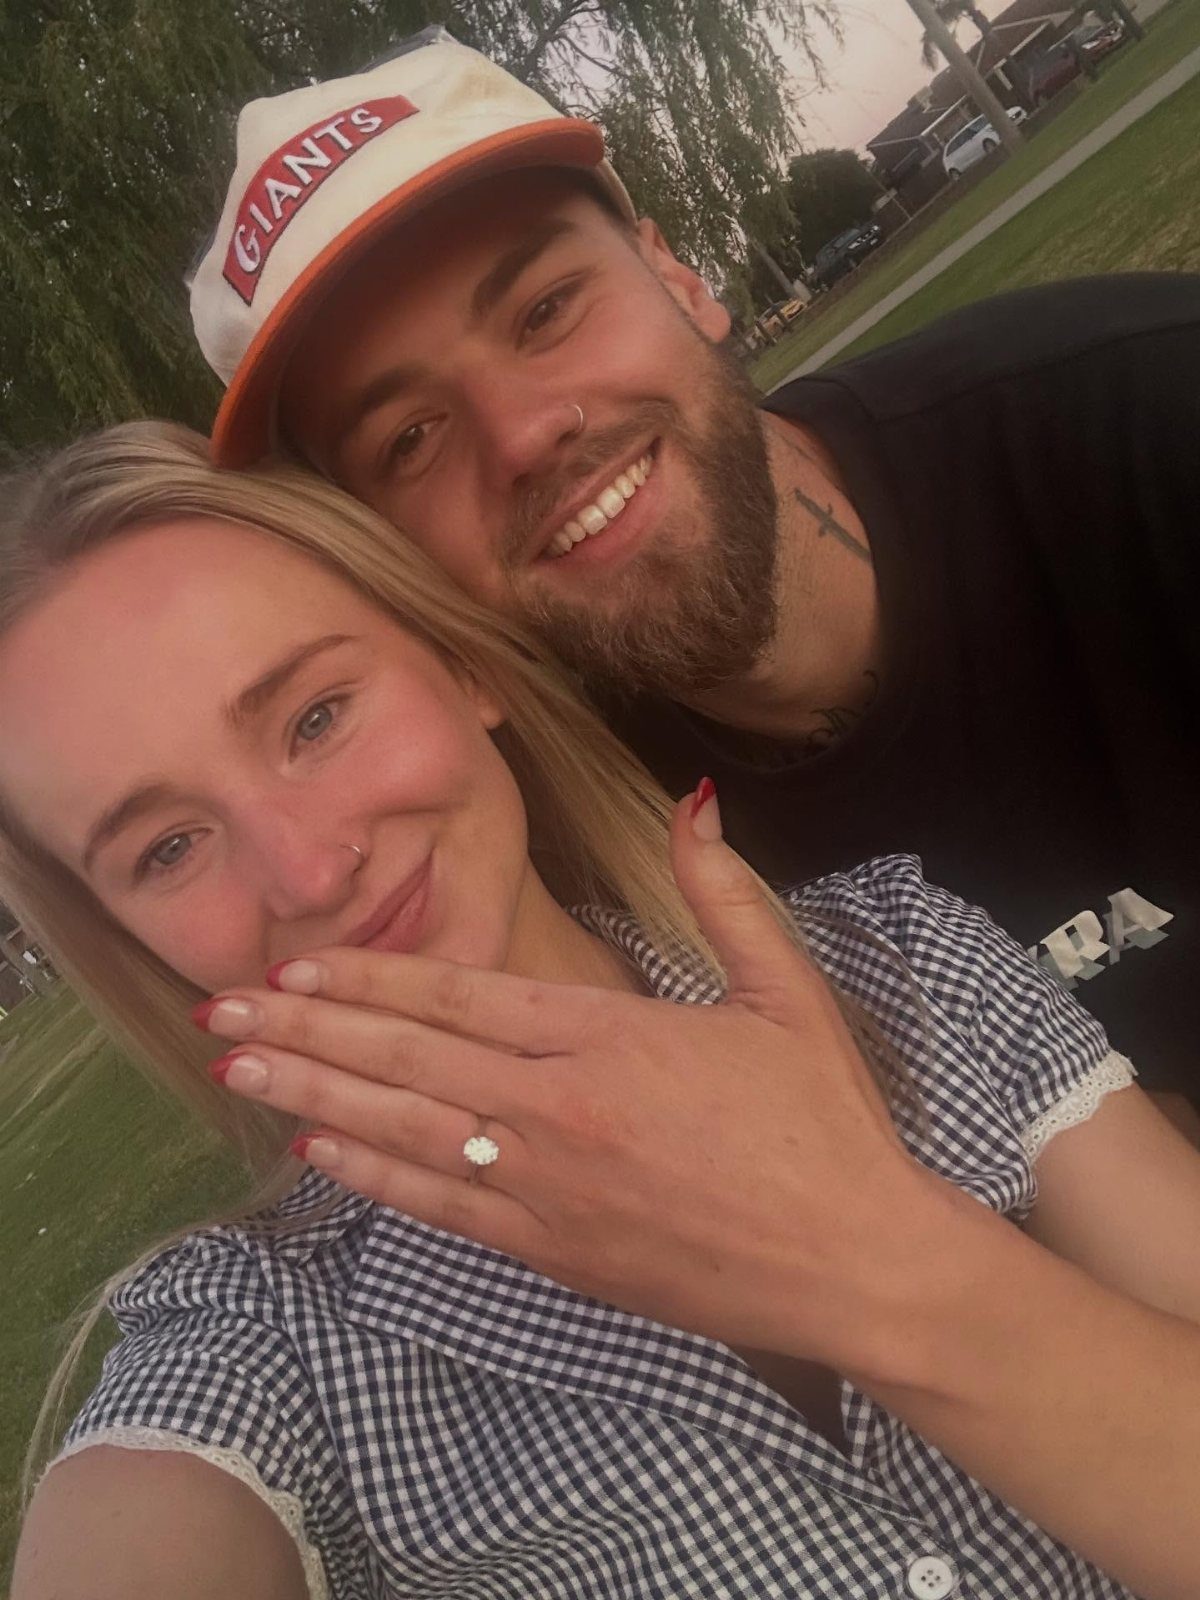
A selfie gives you the loosest framing here, which is exactly why it holds up.
Hold the phone at arm’s length and lift your ring hand next to your face, so the stone sits beside the smile instead of floating below the frame.
Take a dozen or so; the first few usually look stiff.
Wipe the lens and the ring first, since a smudge turns sparkle into haze. A hat or a favorite team shirt makes the shot yours without any props.
9. Double Exposure
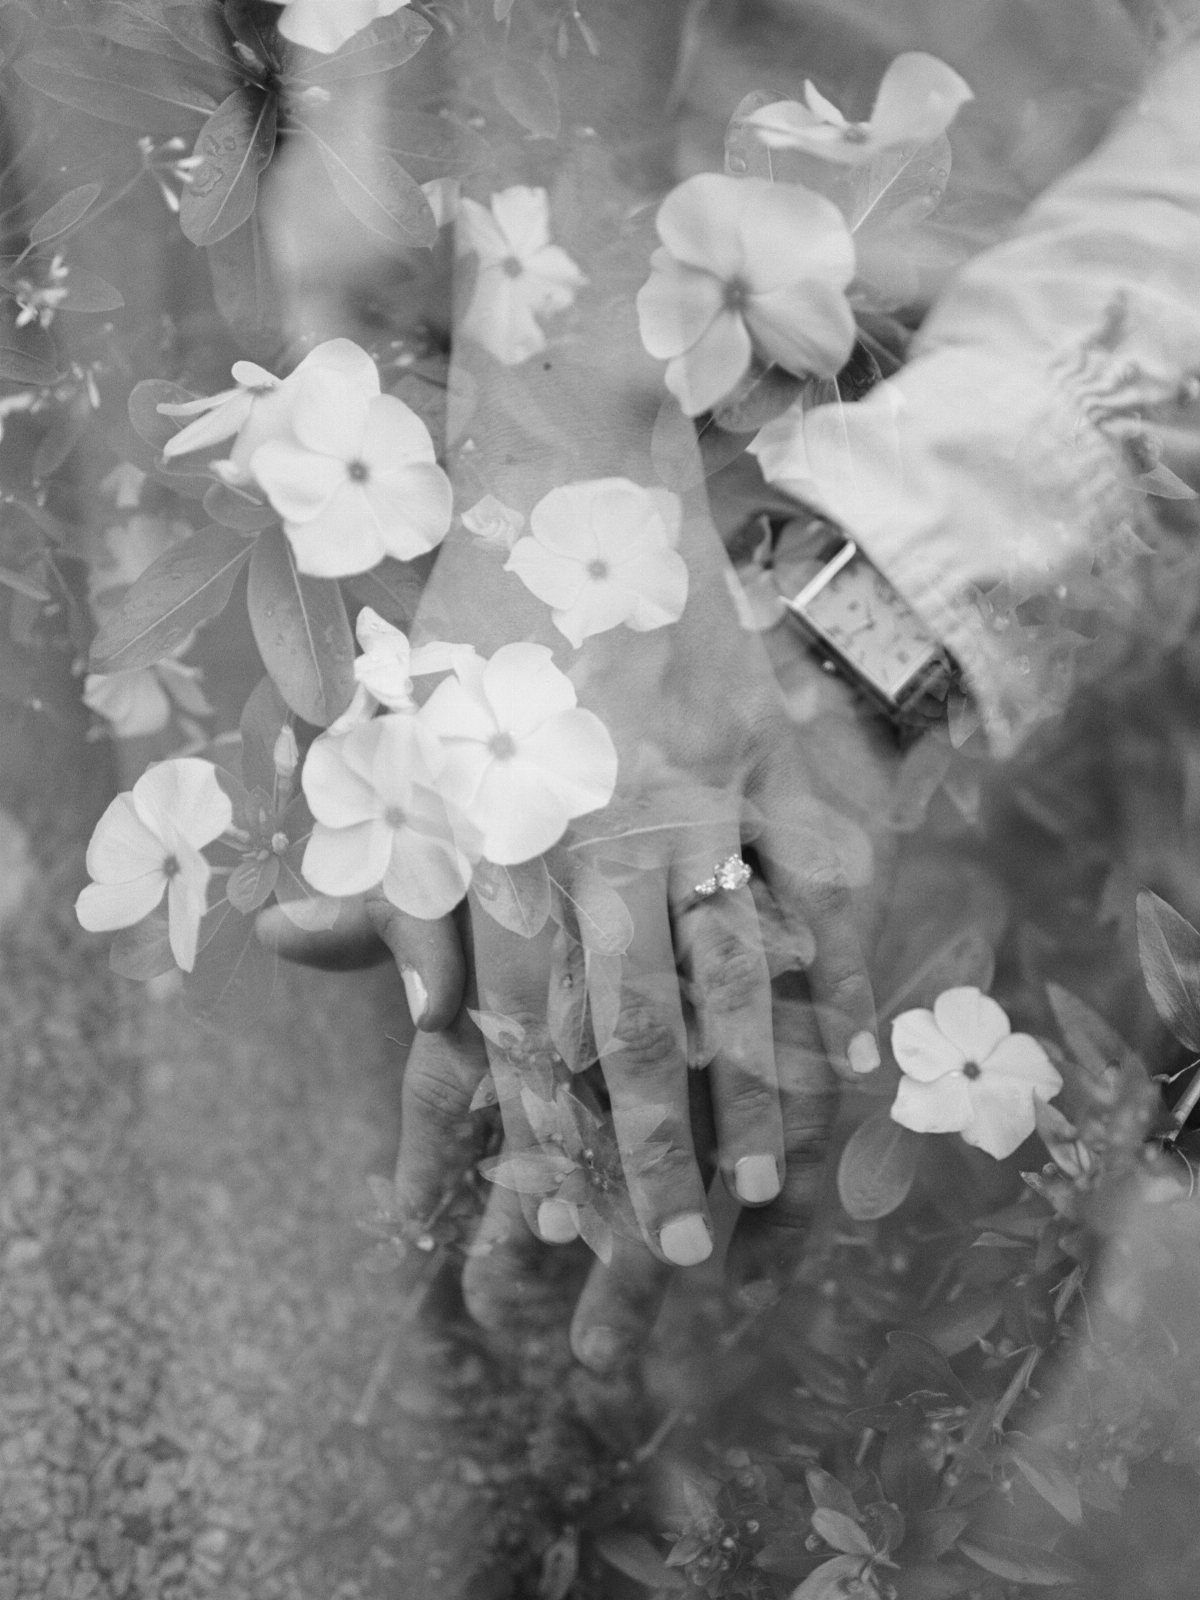
Layer two photos into one frame: a close shot of joined hands and the ring, and a second image of something that means something to you.
White flowers work well in black and white, because the petals add texture without fighting the ring for color.
Choose a second image with plenty of open space, or it will bury the ring.
A couple’s silhouette or a wide scenic view are also options. Your photographer shoots both layers deliberately, keeping the hands as the brightest element when the images combine.
10. Ring on a Book
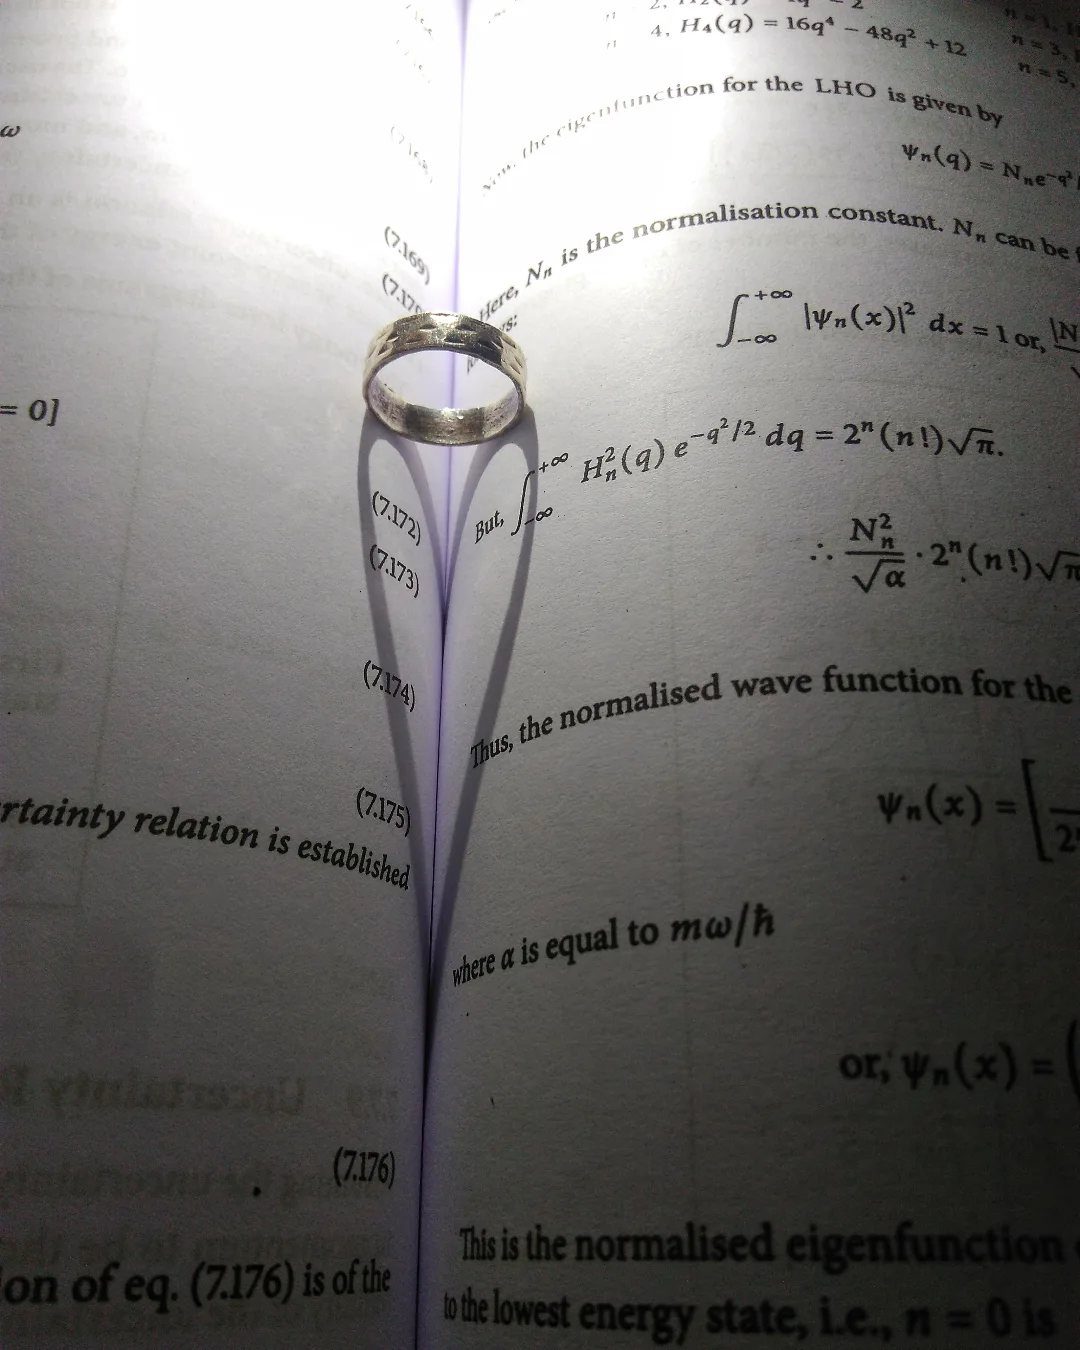
Set the ring in the center fold of an open book and the gutter holds it in place. Pick a page that says something about you two: a favorite novel, a poem, even a textbook full of equations.
Dense text gives a busy backdrop, so shoot from low and close, and let the type blur behind the band.
A plain metal band stands out against the pages. This is among the cheapest setups here, since you likely own the book already.
11. Hands on Chest
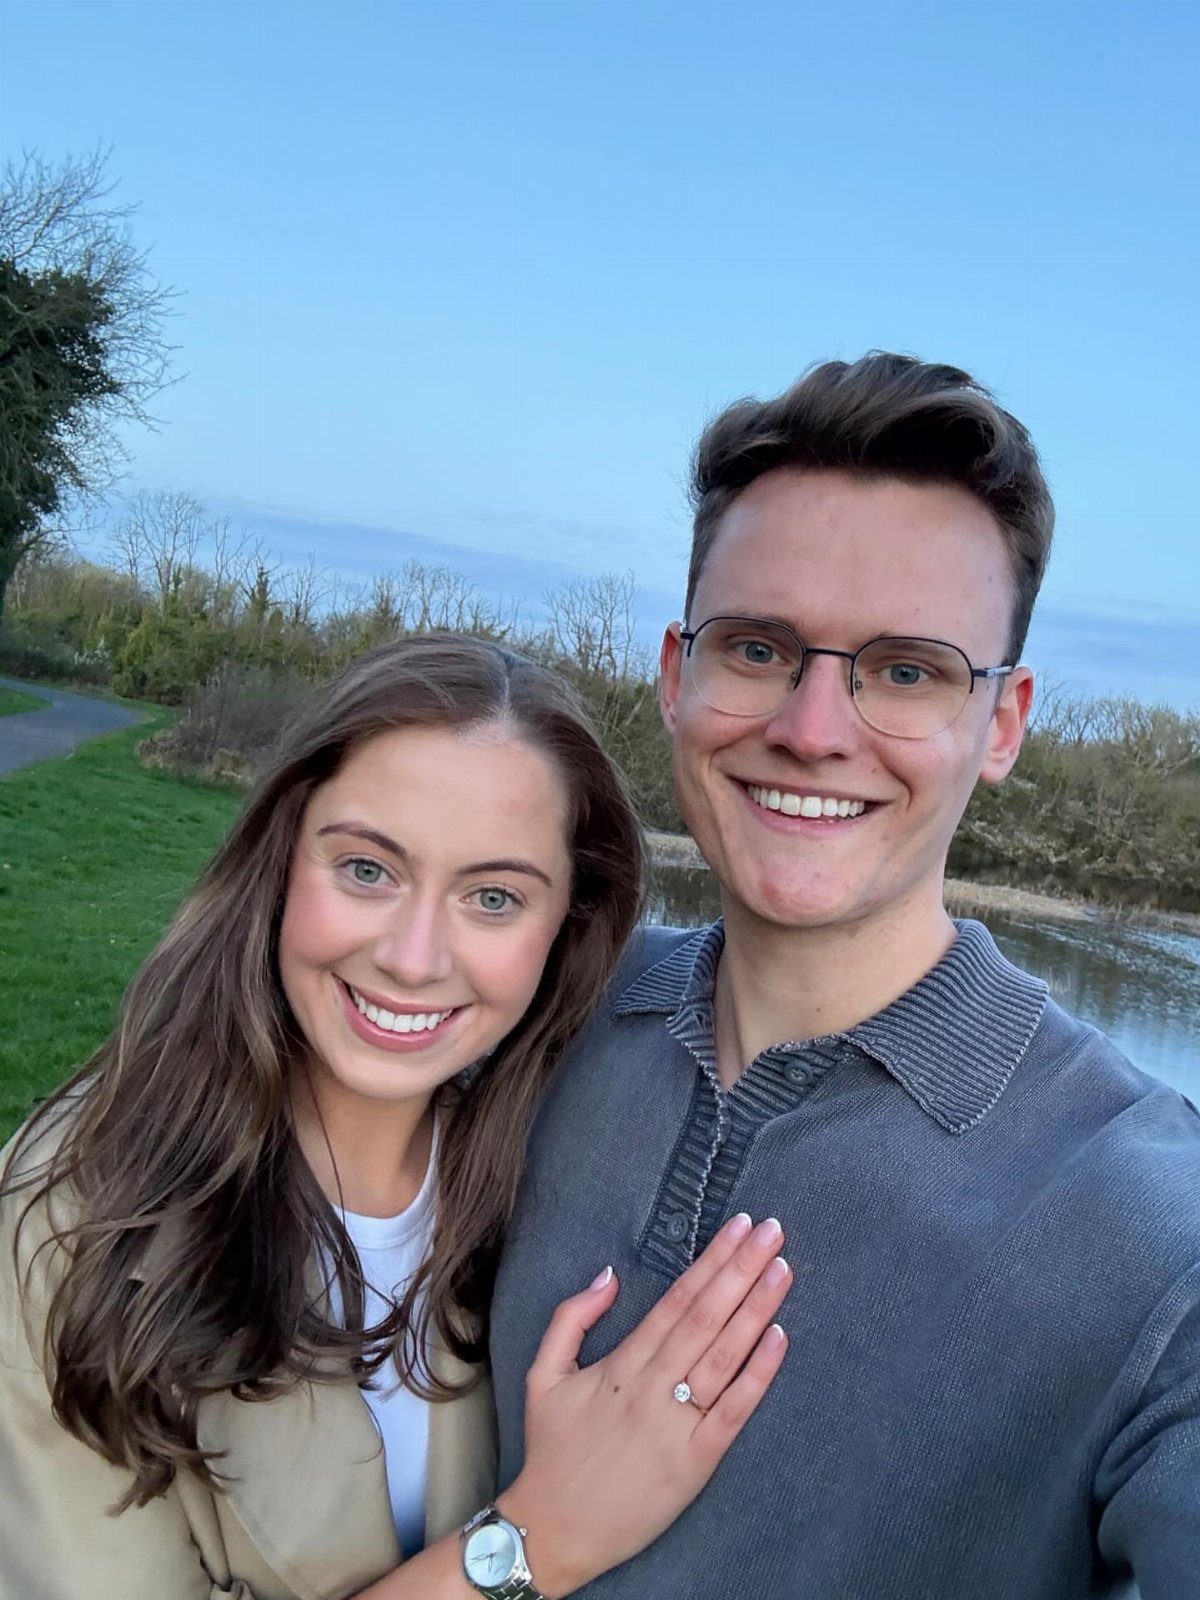
Her hand rests flat on his chest so the ring sits dead center, with both faces smiling above. Fingers slightly spread show off the stone better than a clenched hand.
An open outdoor spot like a lakeshore gives a clean, quiet background, so nothing competes with the hand.
The ring takes the sharpest focus while your faces blur just slightly. A solid shirt for him works better than a pattern, which competes with the ring instead of framing it.
12. Ring Placed on the Finger
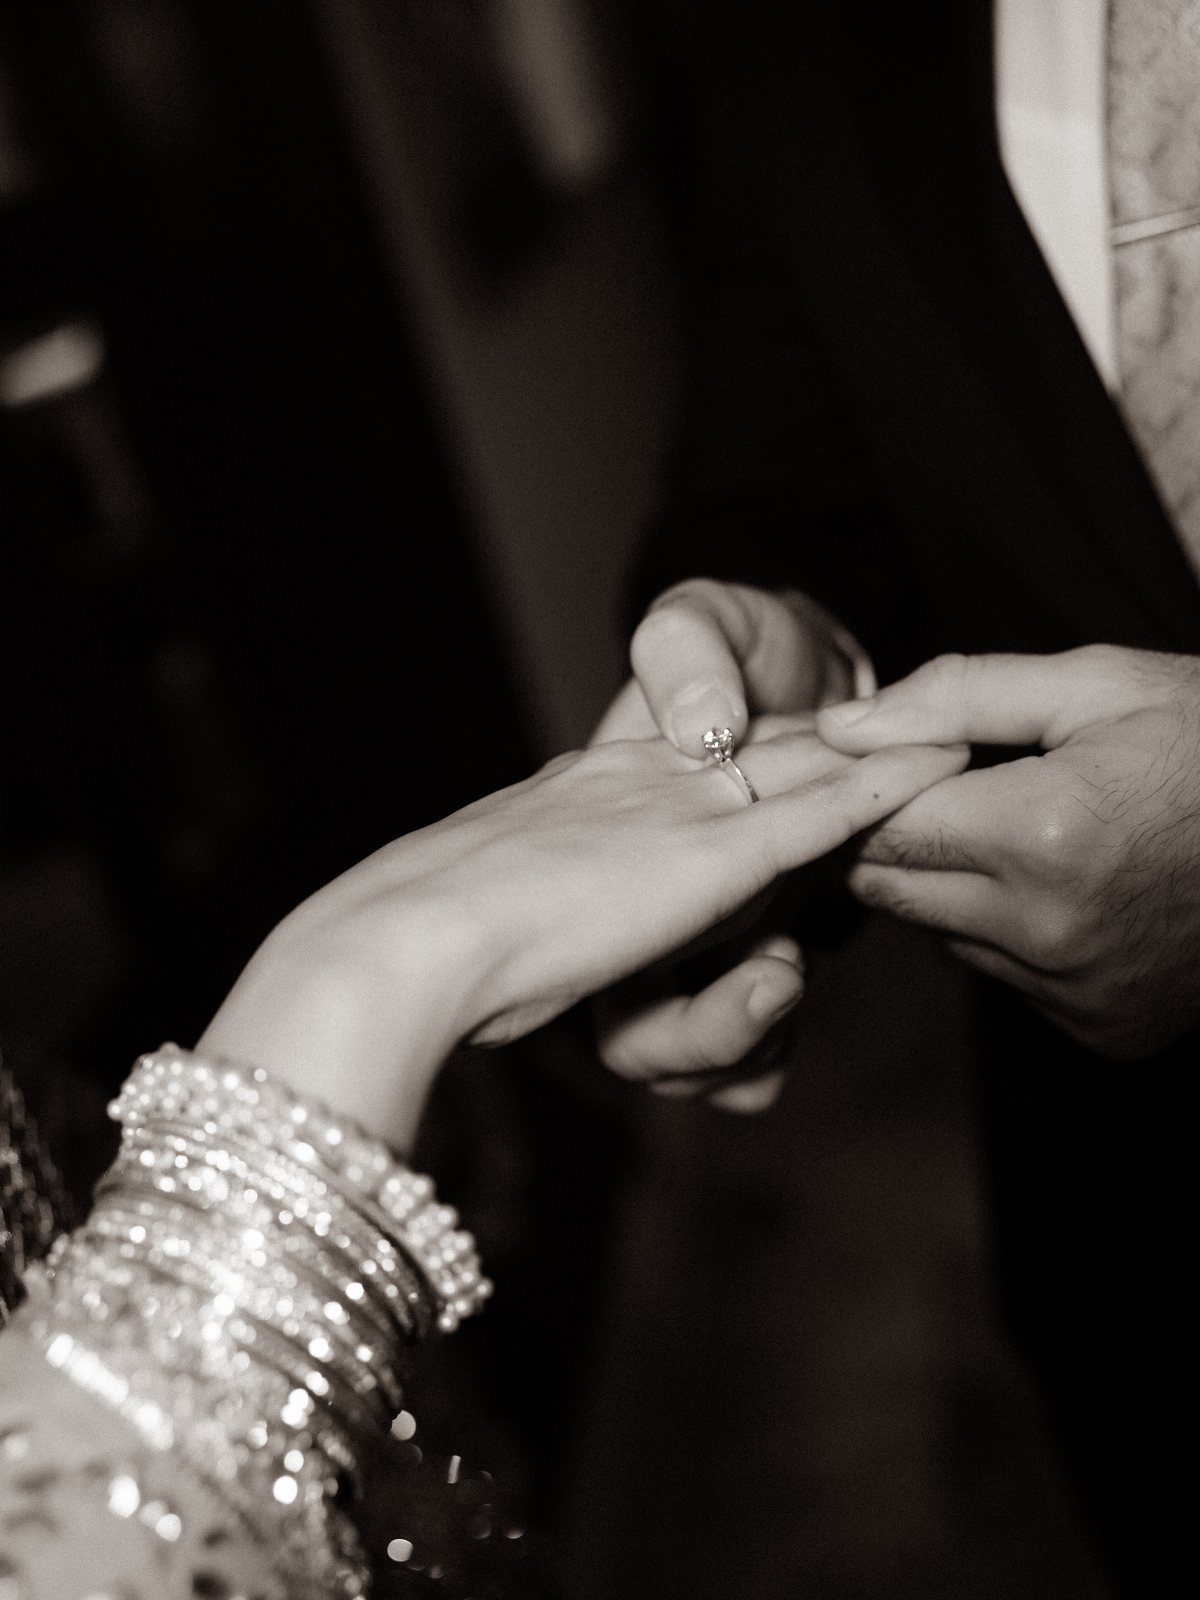
Slide the ring onto the finger while the camera is close on both hands.
Stack bracelets on the wearing hand if you like; they add shine, but keep them from crowding the ring.
Do it slowly, and repeat it a few times so your photographer can get the exact moment the band passes the knuckle.
13. With a Pet’s Paw
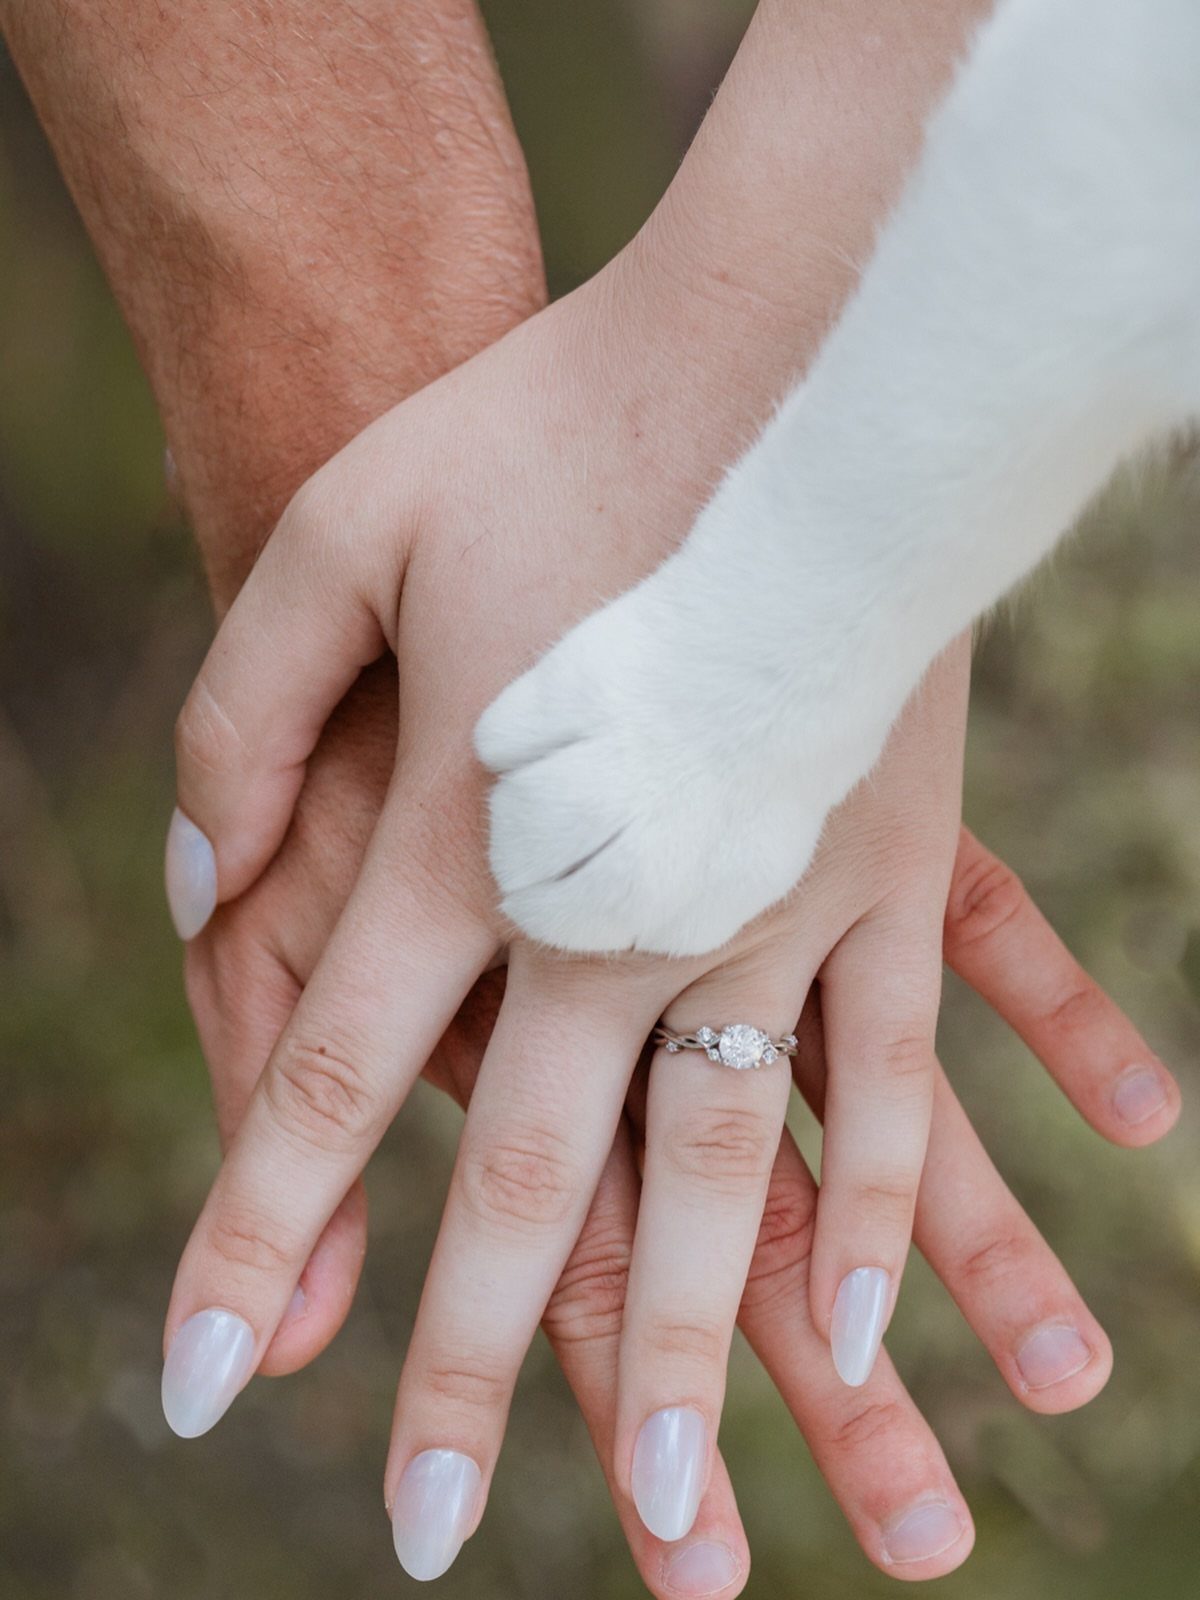
Stack your hands, ring hand near the top, and let your dog rest a paw on the pile. The paw adds a bit of fur and personality, and the ring stays in clear view.
Keep the dog calm first; a few treats help, and a sit or a down works better than a standing pose. Shoot a handful of frames, since paws move.
14. Balanced on a Pet’s Nose
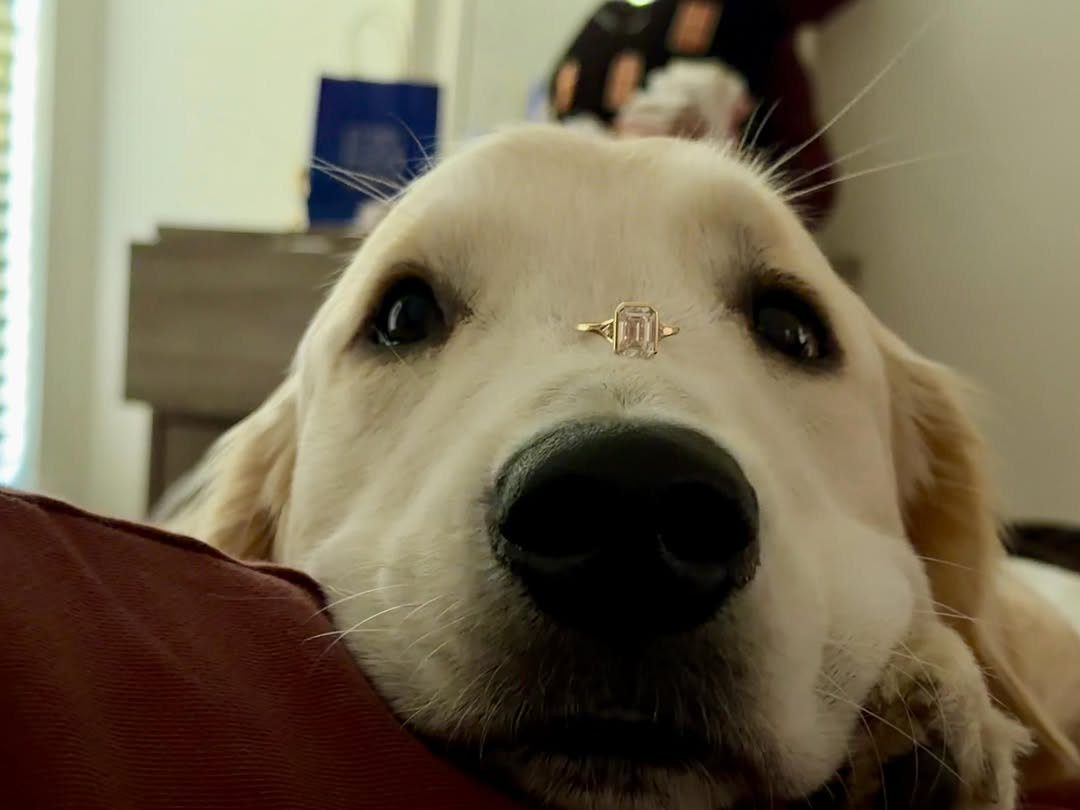
A ring balanced on a dog’s nose is a portrait first and a ring shot second. It suits a calm dog that will hold still for a few seconds.
Practice the balance with no ring on the nose, using a treat as the reward, before the shoot.
Keep the camera low and close, level with the ring, and set the focus on the stone so the pet’s face softens behind it.
Keep a hand ready beneath the muzzle, because a diamond ring on a floor is a stressful thing to hunt for. Indoors, a window gives soft light.
15. Ring Inside a Seashell
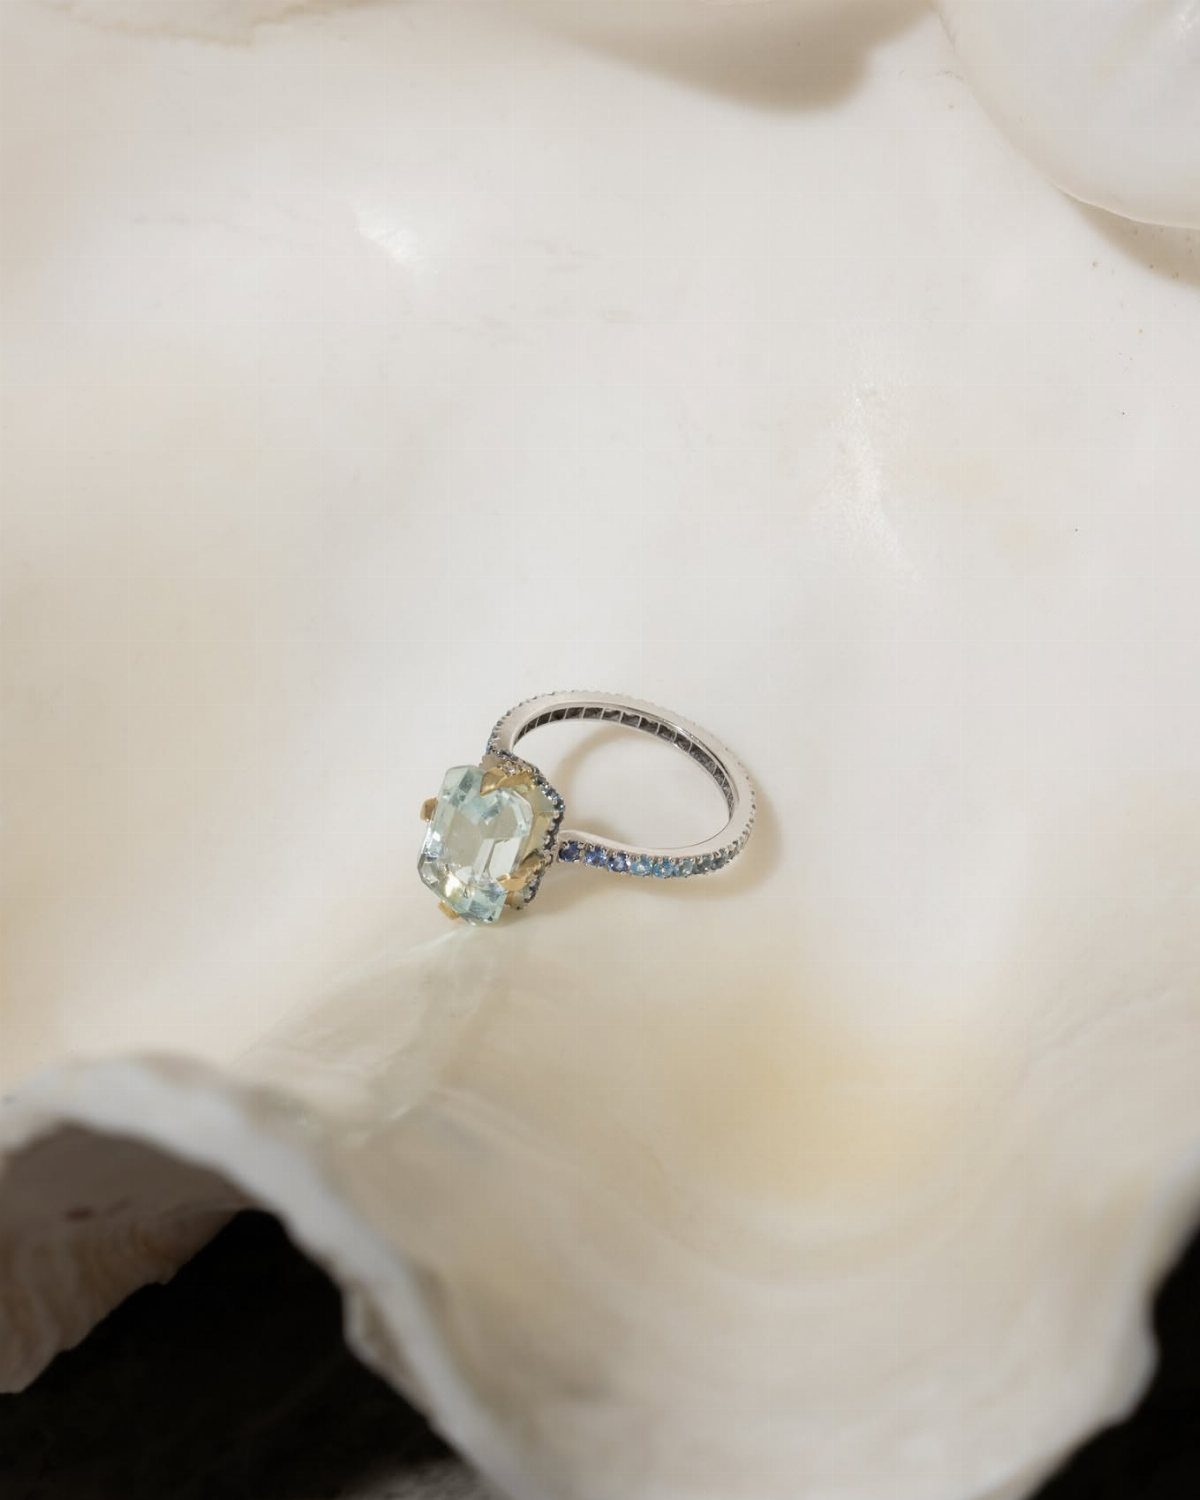
Pick a large, open shell with a pale interior, and the ring has a natural cradle.
Rest the band so the stone faces up, and tilt the shell slightly toward the light.
Shoot close and let the shell’s edges blur. A beach is the obvious setting, but a shell on a windowsill works just as well and costs nothing if you already own one.
16. Partner Kissing Ring Hand
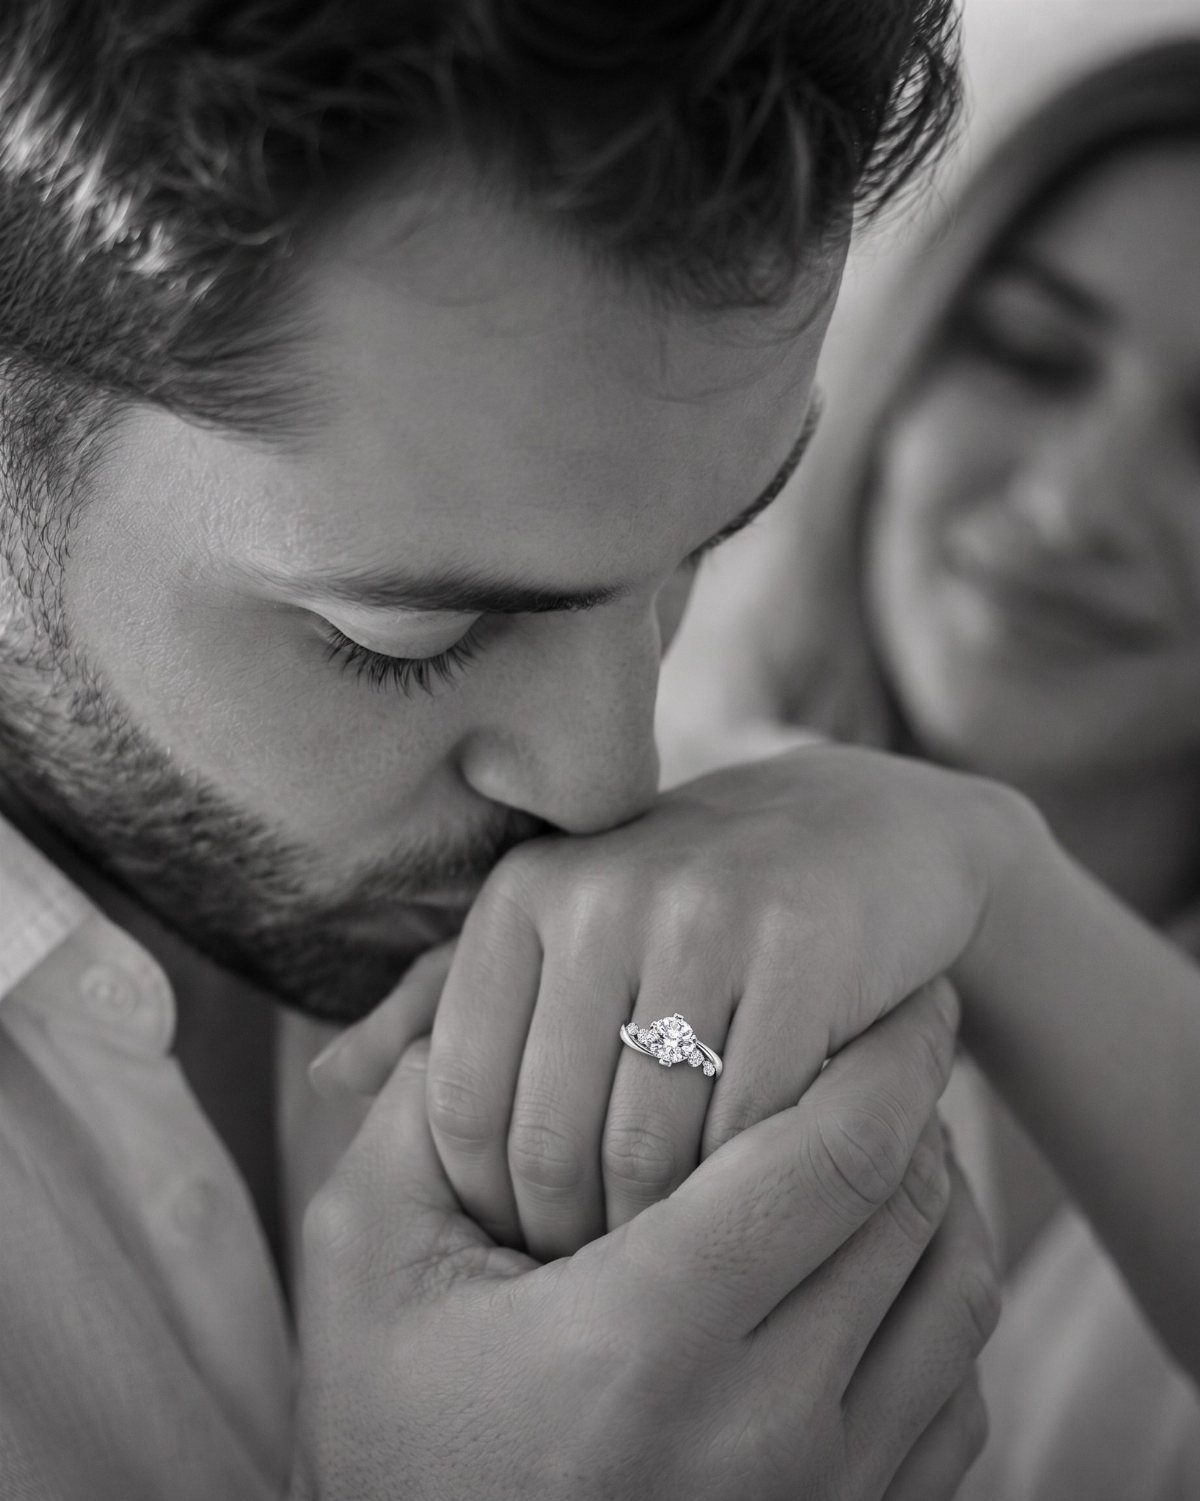
Black and white suits this pose: his lips to her knuckles, her smile soft behind. Without color, the eye settles on the ring and the gesture.
Have her hold her hand relaxed and slightly lifted, with the ring facing the camera. He should kiss the back of the hand without covering the stone.
Her face can go soft in the background; the lens should lock onto the ring and the hand wearing it. Slow it down; a quick peck blurs the moment.
17. Hand in Foreground with Couple
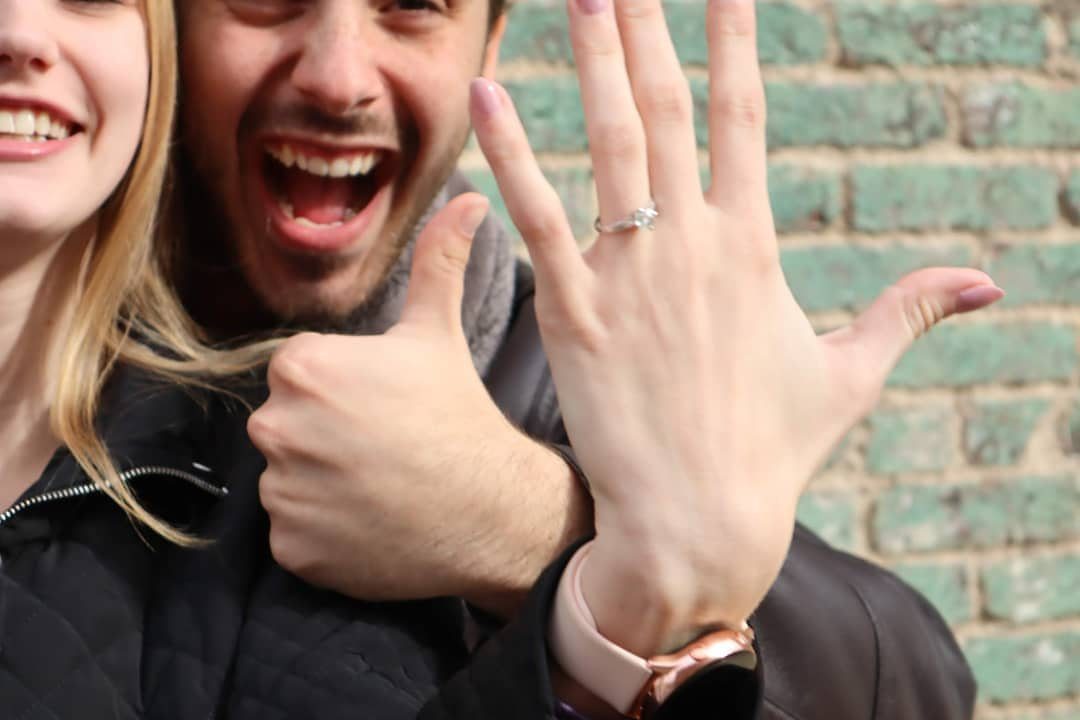
Reach your ring hand toward the camera while you both smile behind it. The ring sits large and sharp in front, and the two of you stay readable in the soft background.
Keep the hand close to the lens but not touching your face.
A plain wall, like brick, gives you a calm backdrop that won’t fight the ring. I would keep both.
18. Rings Held in Teeth
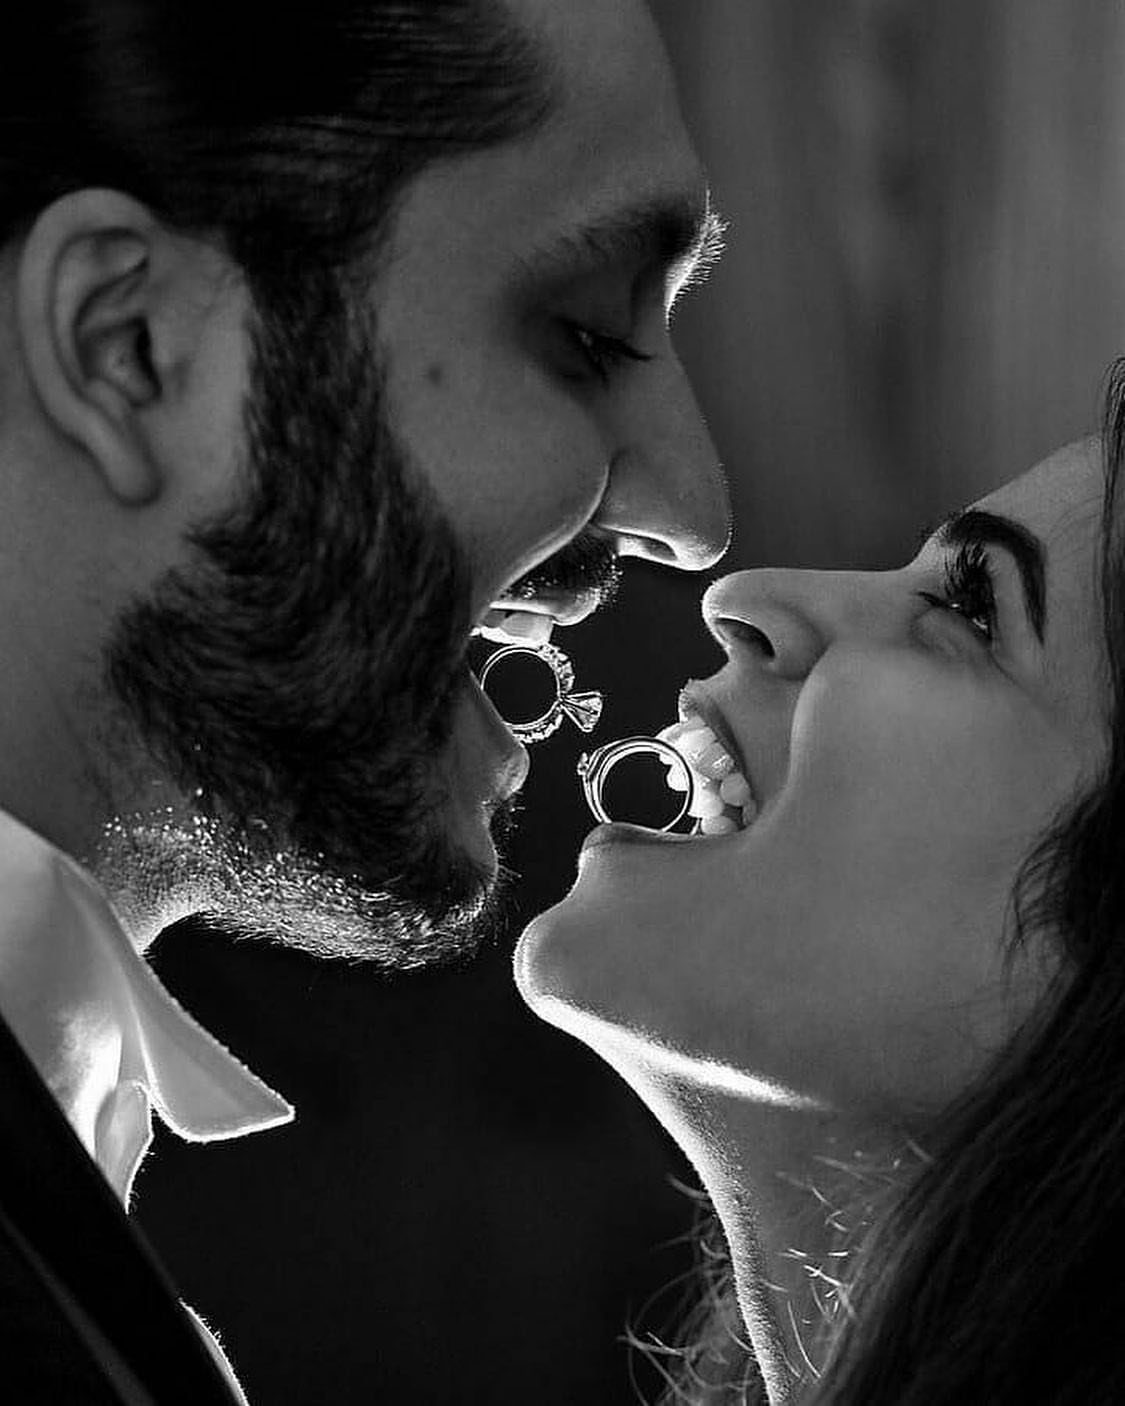
Hold a ring gently between your teeth, face to face with your partner, and the shot turns playful and a little dramatic.
Grip the band lightly with your front teeth; never bite down on the metal or the stone.
Keep your lips relaxed, and take only a few frames, since it gets awkward fast. Clean the rings first, because they will be close to the lens.
19. In an Ornate Mini Frame
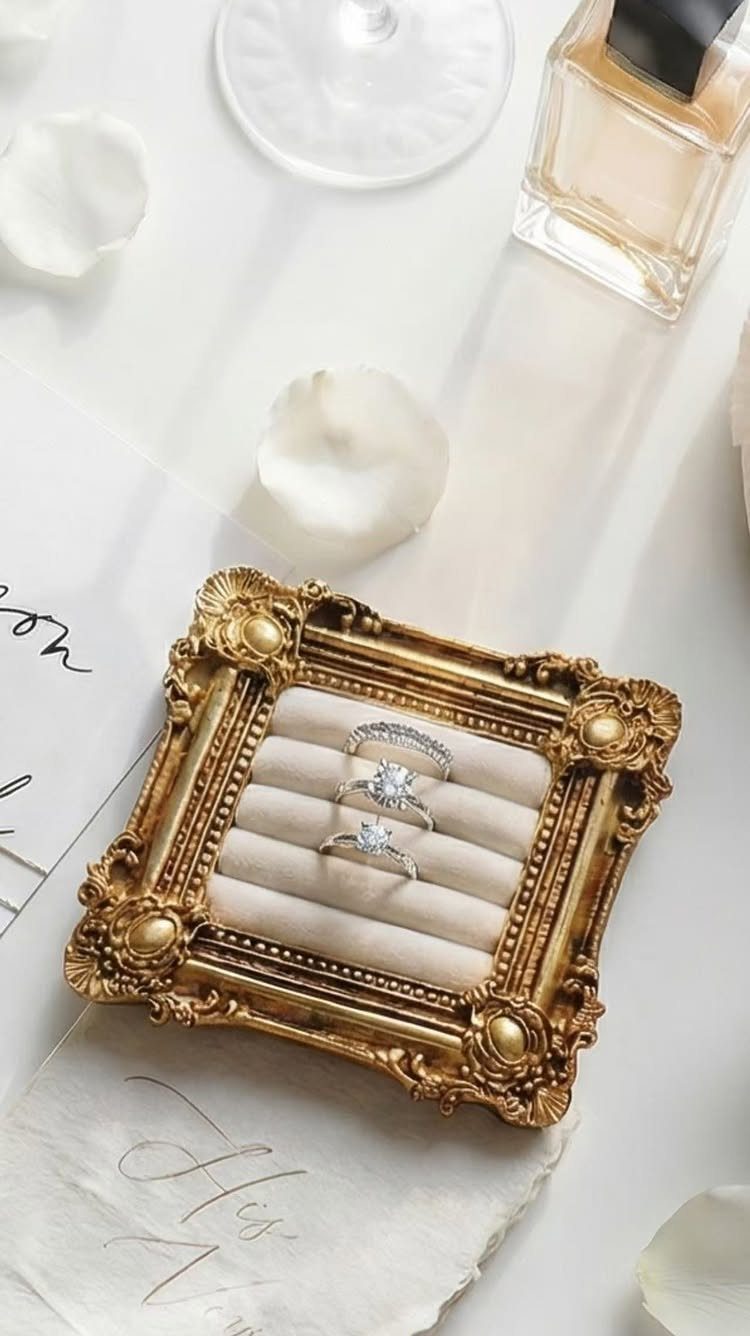
A small ornate frame turns a few rings into a still life: set them on the velvet panel inside it, and the gold border does the framing for you.
Surround the frame with the stationery and florals from your wedding suite, such as a handwritten note, loose white petals and a glass or perfume bottle.
Keep the rings in a tight row so none overlaps another, and shoot from slightly above.
Choosing the Right Location
Pick the place that fits how the two of you actually spend time together. A park or garden suits couples who like to walk, a beach suits sea people, and a city street suits couples who met in one.
For a more private feel, a comfortable spot at home works just as well. Fewer strangers means you relax faster, and relaxed hands photograph better.
Whatever you choose, the setting should complement the ring instead of competing with it. A place that matches your style makes the stone look like it belongs to your story.
Camera settings matter here too. Stop the lens down to around f/8 or f/11 and the band, prongs and stone all land in focus together, so the fine detail in the setting stays crisp.
Shooting wide open, say at f/1.8, will leave half the ring soft, and that’s rarely what you want on a close-up of the diamond.
Preparation for the Shoot
A little prep before the shoot, like cleaning the ring and scouting your spot, saves time on the day and you can see it in the final photos.
Plan the equipment, the shot list, the logistics and a fallback for anything that goes wrong.
On the gear side, clean the lenses, charge the batteries and check the memory space before you leave. A full card halfway through the shoot is an avoidable disaster.
Talk through your ideas with your partner, and with your photographer if you hire one, so everyone shares the same vision. Agree on the handful of shots you most want, and build the schedule around those first.
Frequently Asked Questions
How soon after engagement should you do engagement photos?
Soon after, while the excitement is fresh. A shoot close to the proposal also lets you re-create the moment, and the candid reactions tend to look most genuine then.
A freshly polished ring and a spot you have already scouted mean the session itself can happen on short notice.
What camera settings make an engagement ring look sharp?
Stop the lens down to around f/8 or f/11 so the band, prongs and stone all land in focus together.
A wide-open aperture like f/1.8 blurs half the ring. Open shade or an angled light also helps, since direct sun washes out the facets.